Tag Locations
Tag Locations allows users to view, add, edit, or delete Locations and Cells within those Locations for Tags in the system. Tag Locations help users to locate different Tags within different departments for Inventory.
To view Tag Locations, navigate to the  tab and click on the
 ![]() icon. The Tag Locations screen will appear.
icon. The Tag Locations screen will appear.
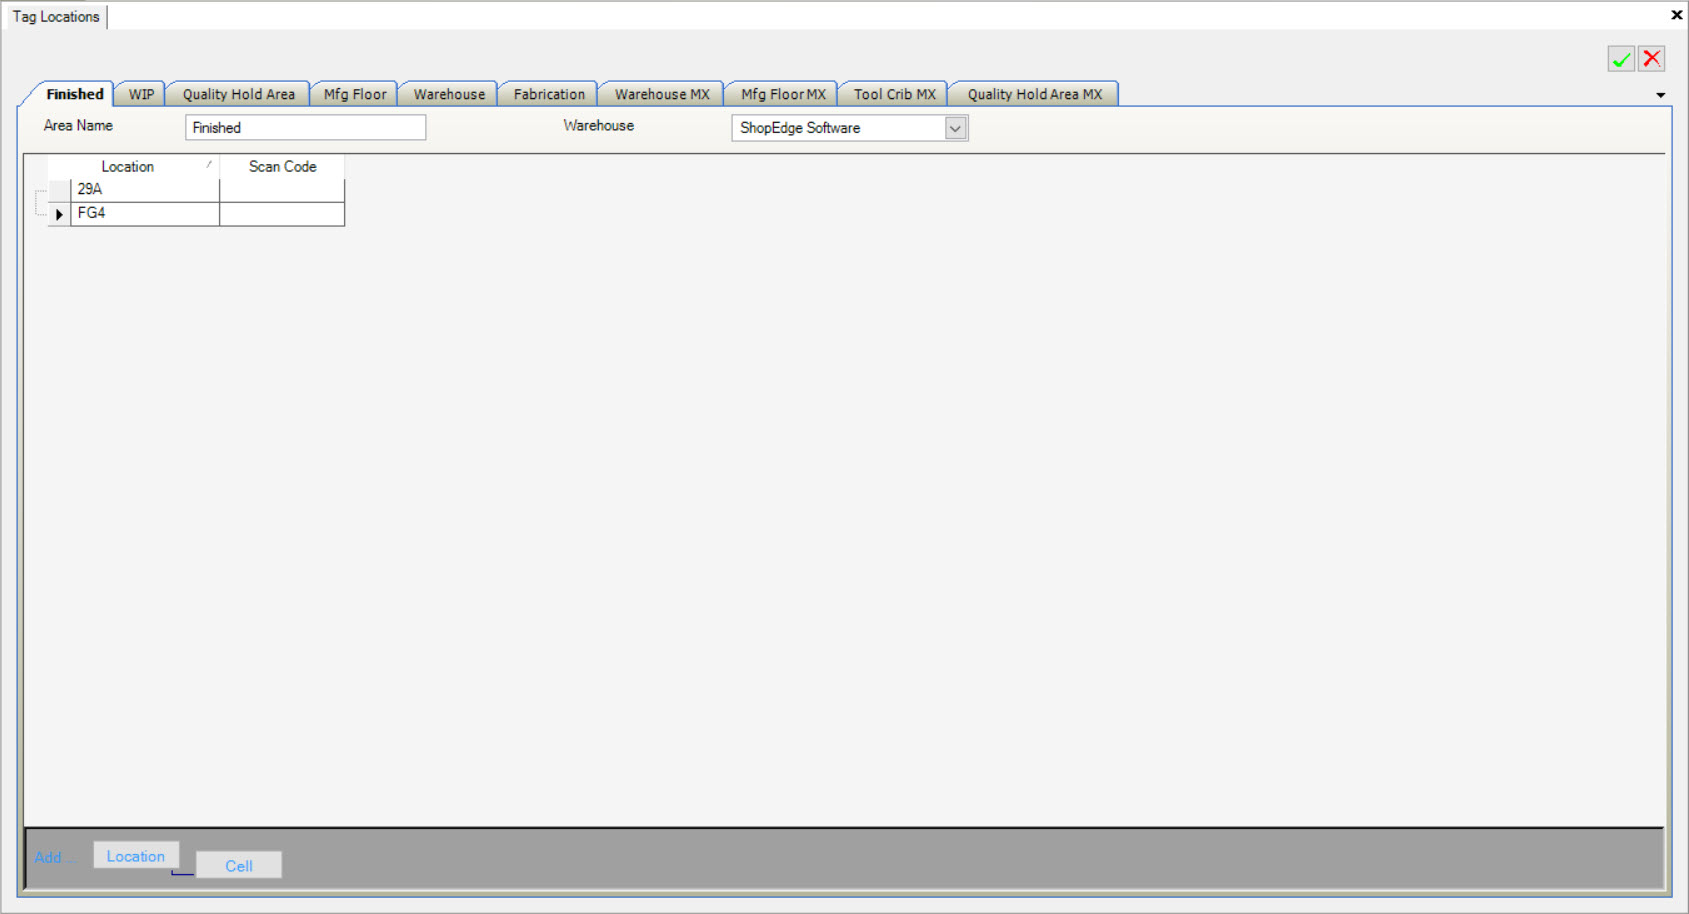
Users can navigate through the different tabs in order to view the Locations and Cells within those Locations.
Adding a Location Tab
To add a Location Tab, navigate to the  tab and click on the
 ![]() icon. The Tag Locations screen will appear.
icon. The Tag Locations screen will appear.

Click on the  button located at the top-right of the screen. A new tab will appear where users must enter in the Area Name and select a Warehouse using the
available drop-down menu.
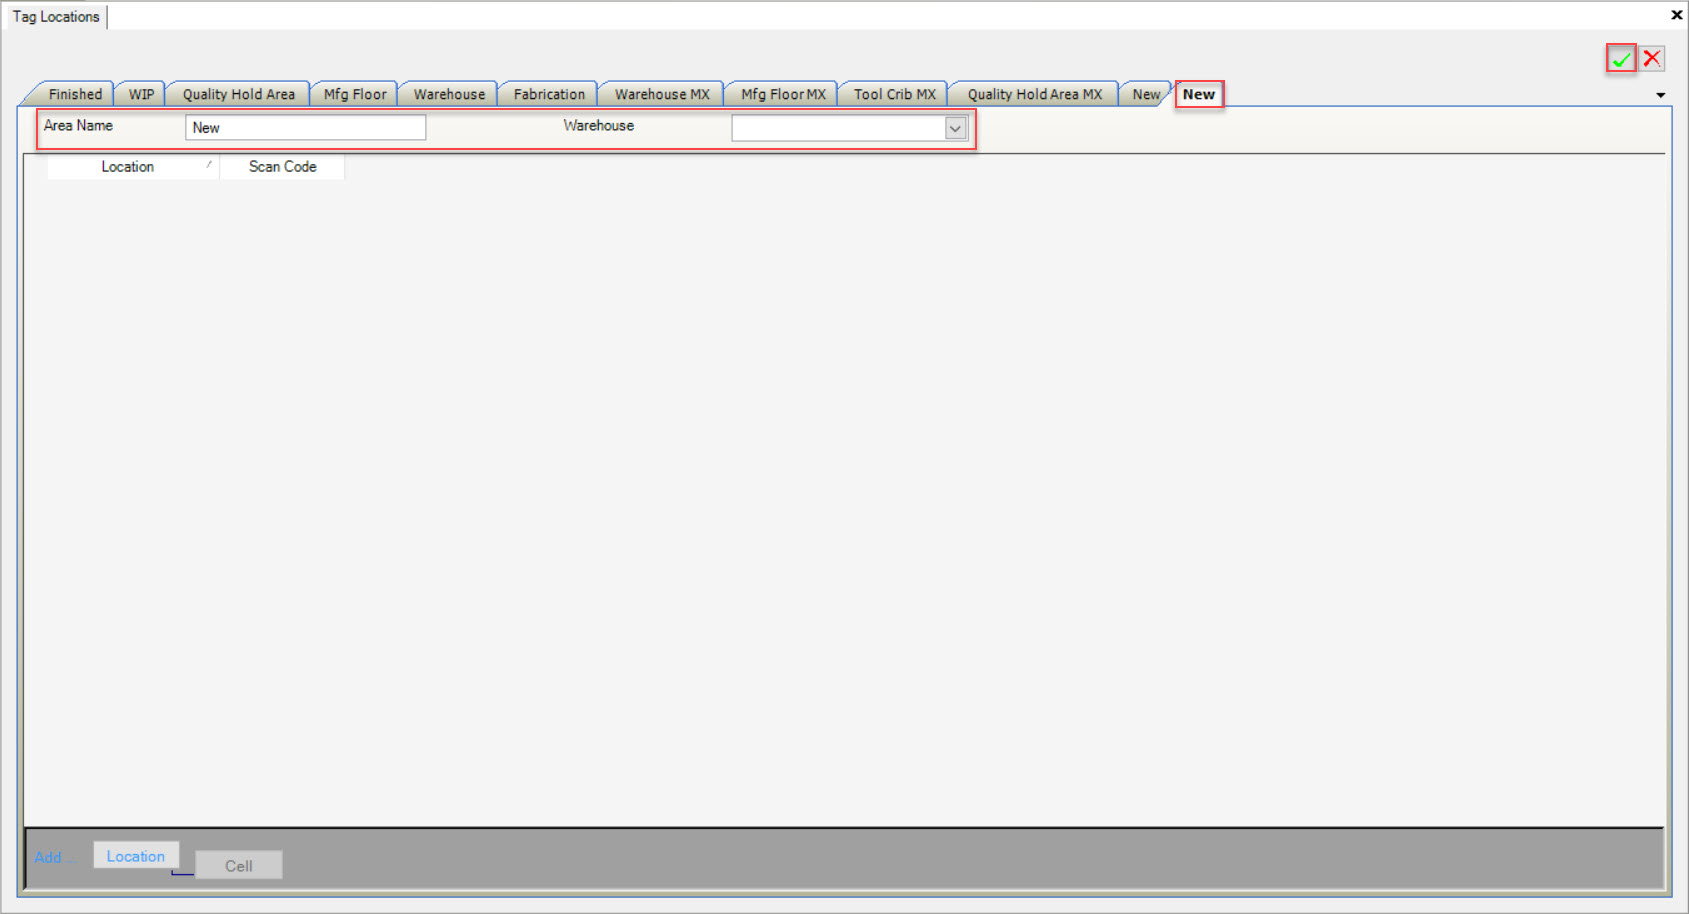
Once the information has been entered in, the new tab will be added to the Tag Locations screen.
Make sure to save before exiting the screen.
Note
Users may add as many tabs as necessary.
Deleting a Location Tab
To delete a Location Tab, navigate to the  tab and click on the
 ![]() icon. The Tag Locations screen will appear.
icon. The Tag Locations screen will appear.

Select the tab you wish to delete. Then, click on the  button.
The selected tab will be deleted immediately.
Make sure to save your changes before exiting the screen.
Adding Tag Locations
Once users have added the appropriate number of tabs, they can begin to add Tag Locations to them.
To do so, navigate to the  tab and click on the
 ![]() icon. The Tag Locations screen will appear.
icon. The Tag Locations screen will appear.

Select the tab you wish to add a Location to. Next, click on the  button located at the bottom of the screen.
A new row will appear where users can enter in a Location and Scan Code. Scan Codes can be used if users would like to create Barcode Labels for Inventory Locations and Cells to make it easier to scan Items to a Location.
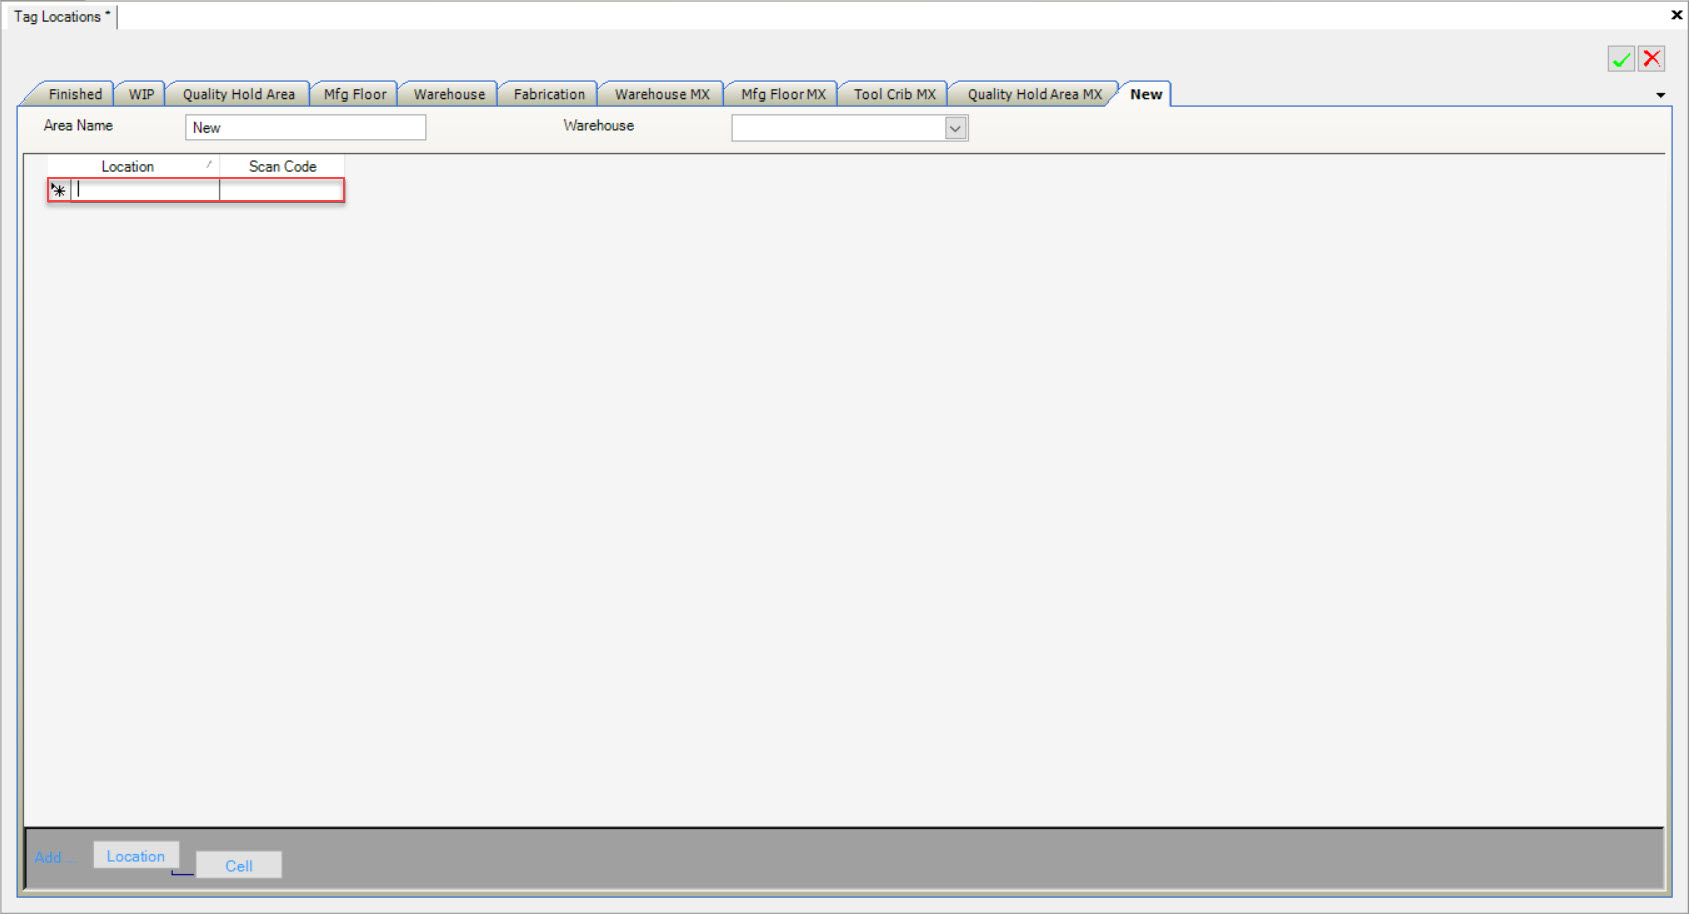
Once the appropriate information is entered, make sure to save your changes before exiting the screen.
Editing Tag Locations
To edit a Location, navigate to the  tab and click on the
 ![]() icon. The Tag Locations screen will appear.
icon. The Tag Locations screen will appear.

Select the tab you wish to edit a Location for and click on it. Locate the Location you wish to edit and make the necessary changes.
Once the necessary changes have been made, make sure to save before exiting the screen.
Deleting Tag Locations
To delete a Location from a tab, navigate to the  tab and click on the
 ![]() icon. The Tag Locations screen will appear.
icon. The Tag Locations screen will appear.

Select the tab you wish to delete a Location from and click on it. Locate the Location and highlight the appropriate row. Use your Delete key and when the system prompts you, select Yes.
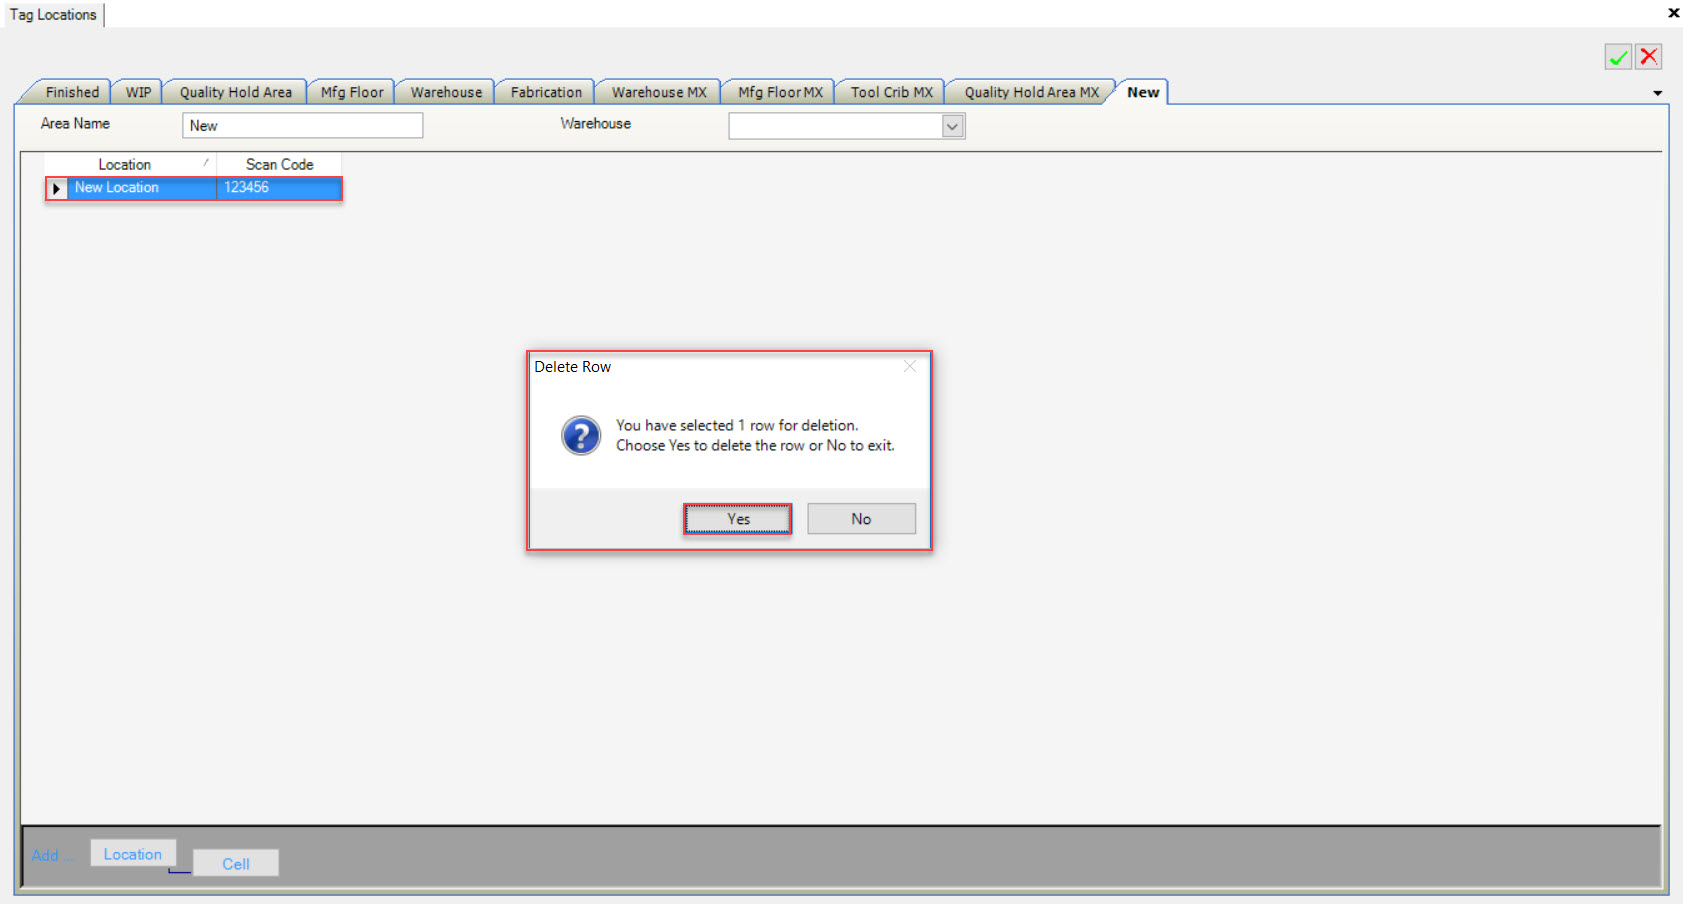
The highlighted Location will be deleted.
Make sure to save your changes before exiting the screen.
Note
If users select a Location to delete with a Cell attached to it, both the Cell and Location will be deleted.
Adding Cells
Once a user has added a Location, they then have the ability to add a Cell to that Location.
To do so, navigate to the  tab and click on the
 ![]() icon. The Tag Locations screen will appear.
icon. The Tag Locations screen will appear.

Select the tab you wish to add a Cell to a Location and click on it. Locate the Location you wish to add a Cell to and highlight the appropriate row.
Click on the  button.
Note
In order to add a Cell, there must be a Location to add it to. If there is no Location, the  button will not be available.
A new row will appear where users can enter in a Cell and Scan Code.
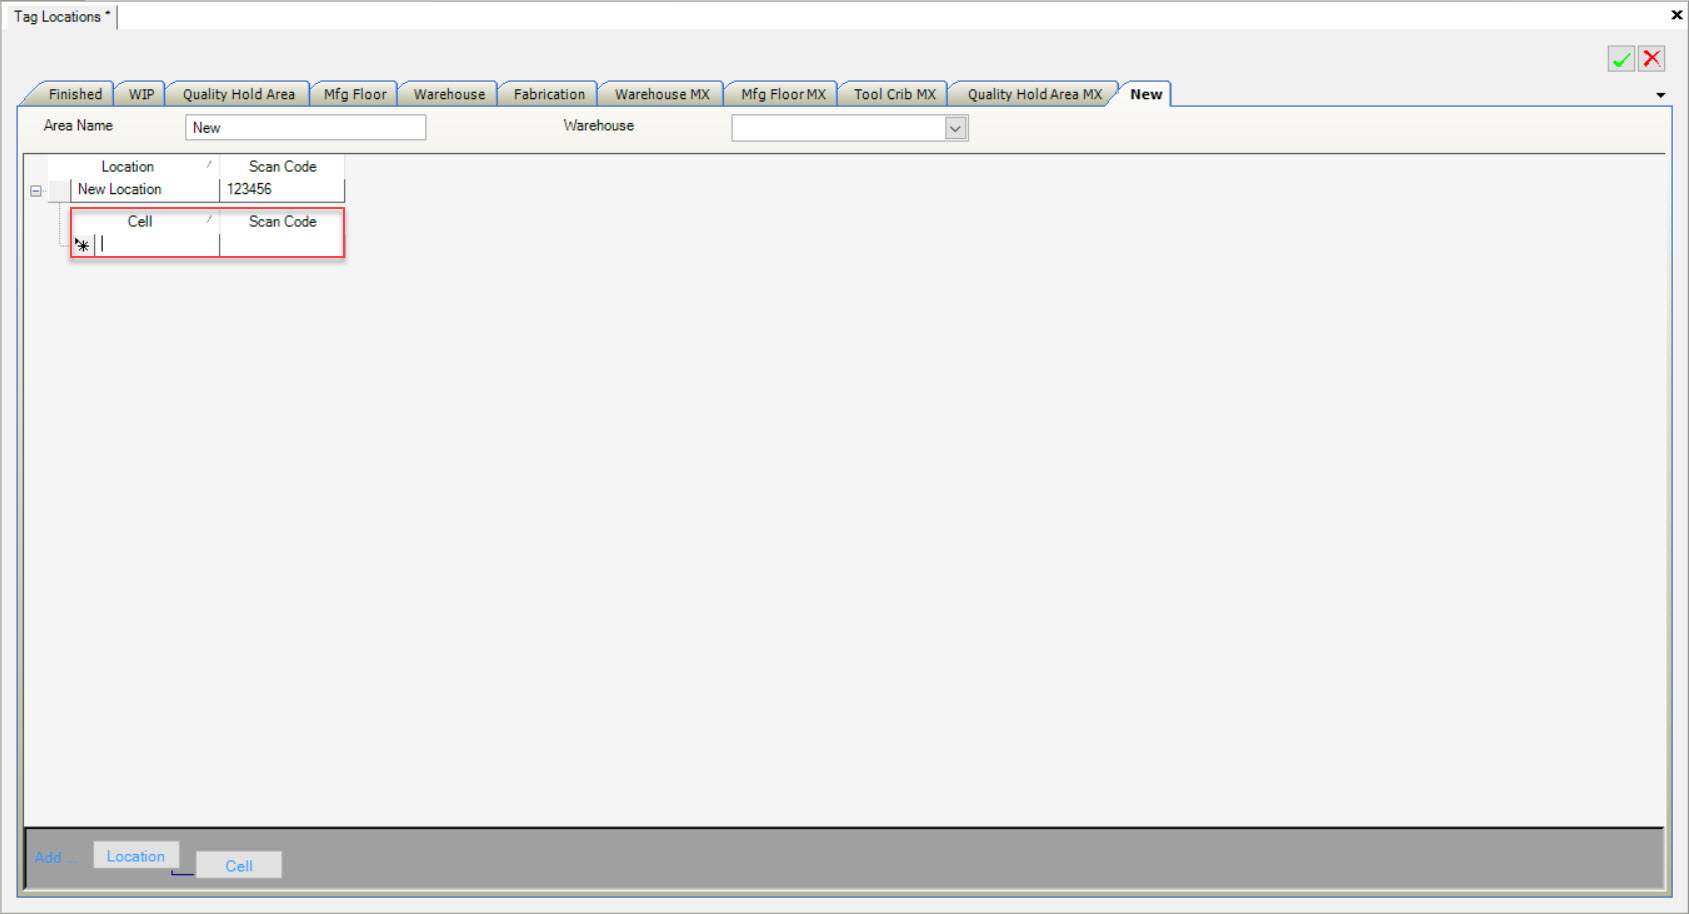
Once the necessary information has been entered in, make sure to save before exiting the screen.
Editing Cells
To edit a Cell, navigate to the  tab and click on the
 ![]() icon. The Tag Locations screen will appear.
icon. The Tag Locations screen will appear.

Select the tab you wish to edit a Cell for and click on it. Click on the plus sign beside the Location to locate the Cell you wish to edit. Make the necessary changes using the available textboxes.
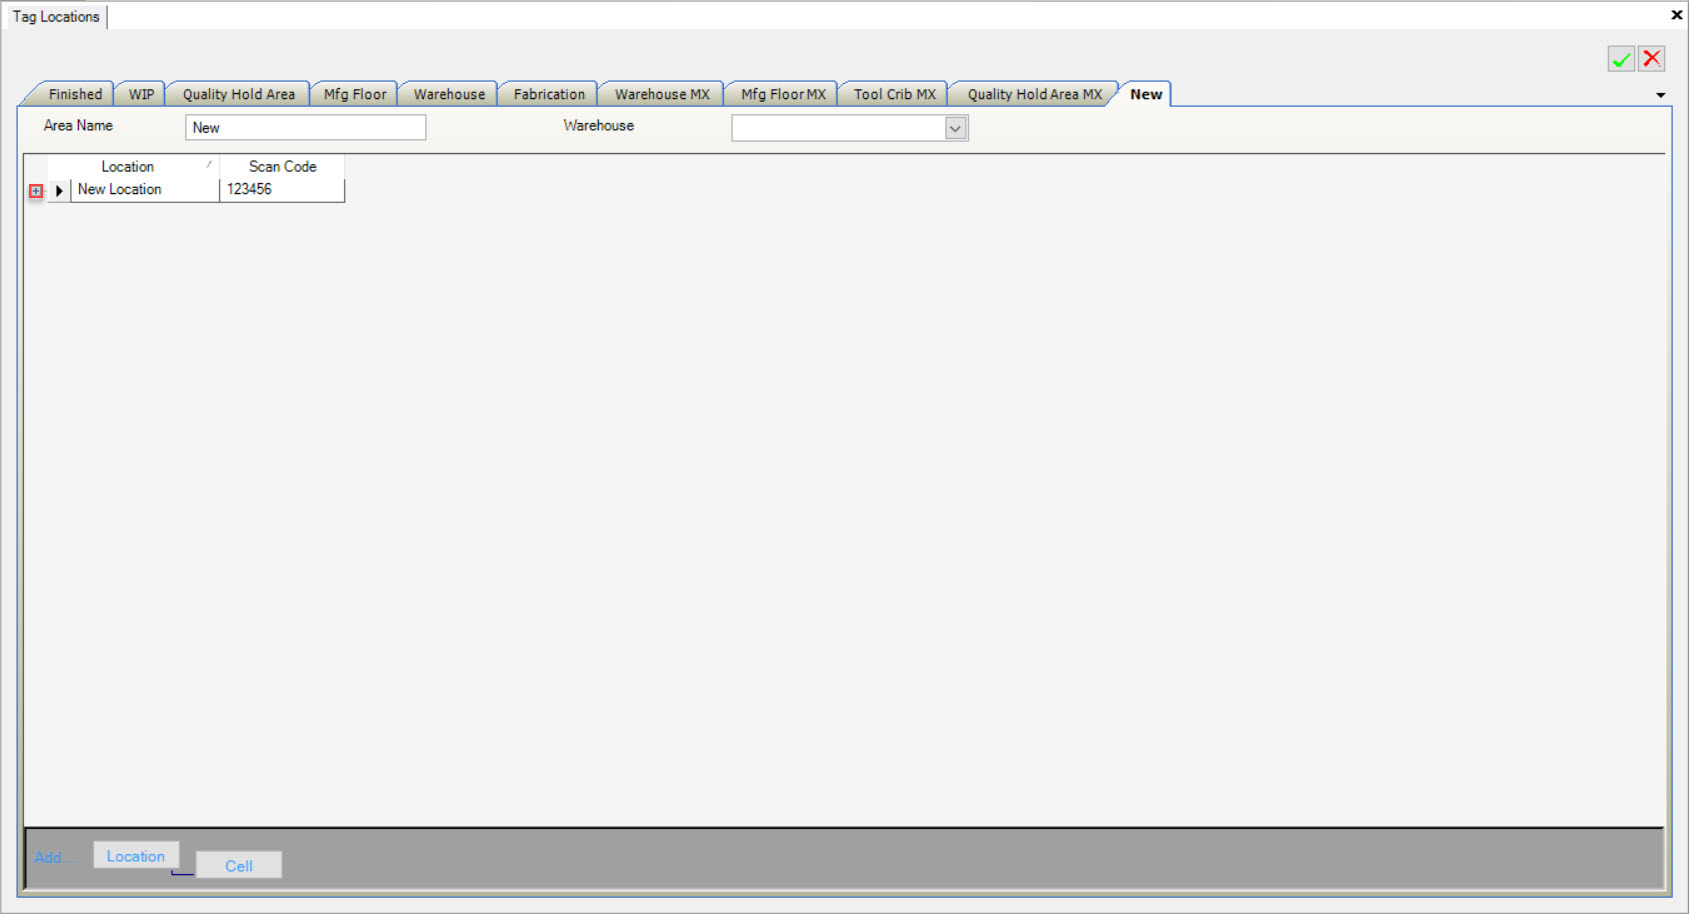
Make sure to save your changes before exiting the screen.
Once the necessary changes have been made, make sure to save before exiting the screen.
Deleting Cells
To delete a Cell, navigate to the  tab and click on the
 ![]() icon. The Tag Locations screen will appear.
icon. The Tag Locations screen will appear.

Select the tab you wish to delete a Cell from and click on it. Click on the plus sign beside the Location to locate the Cell you wish to delete.
Locate the Cell and highlight the appropriate row. Use your Delete key and when the system prompts you, select Yes.
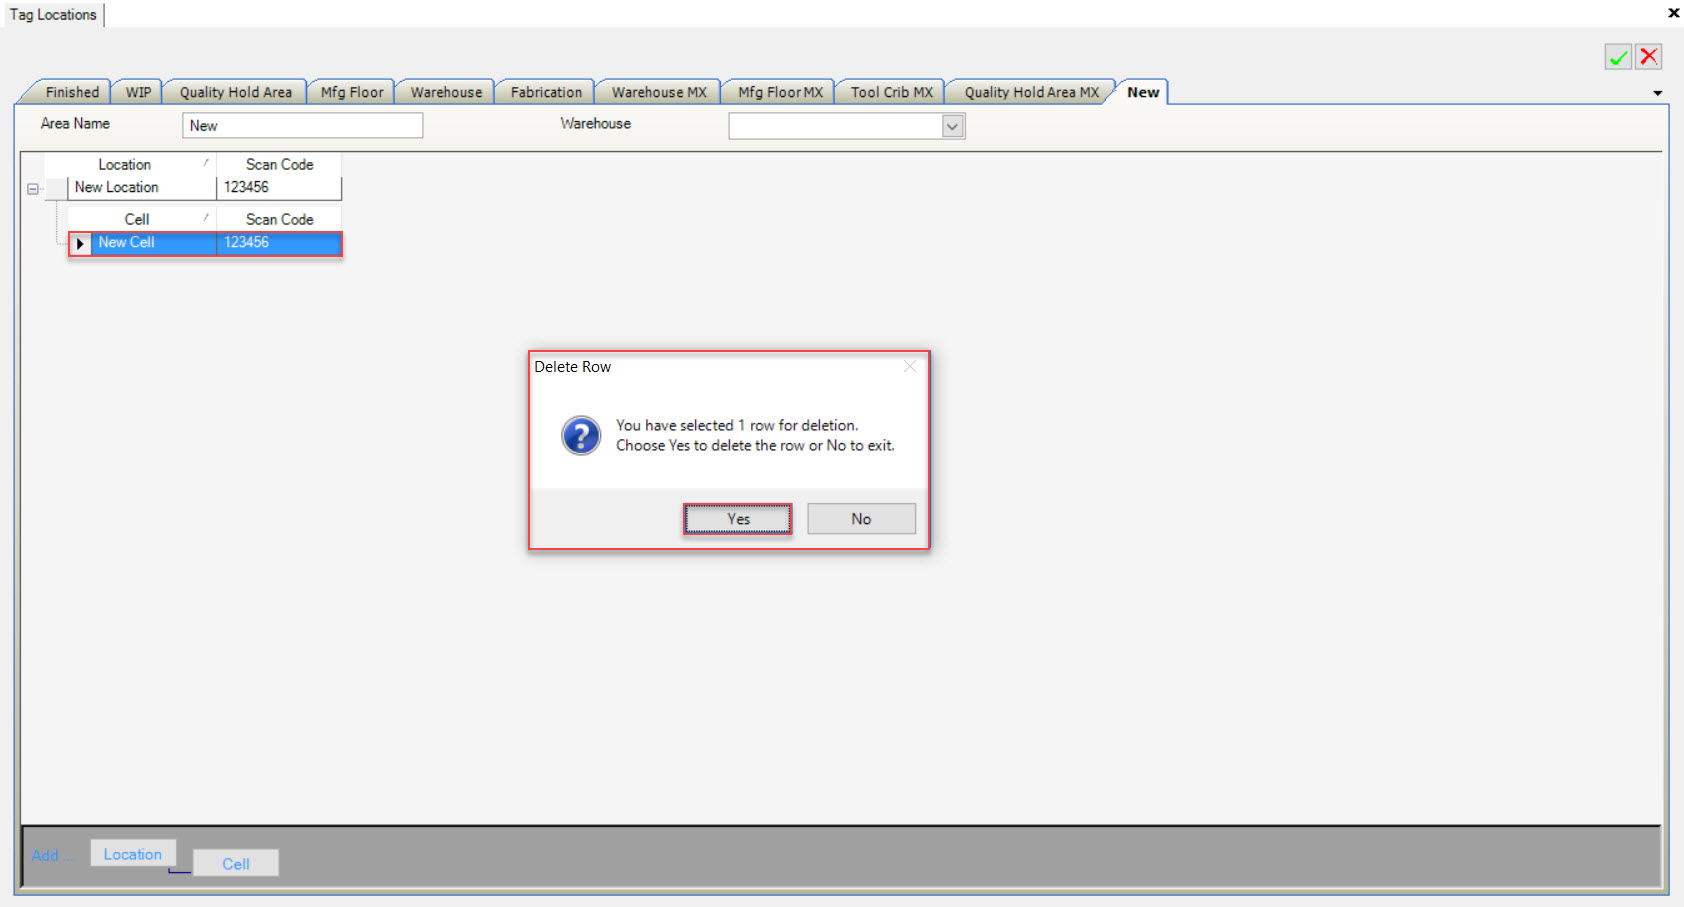
The highlighted Cell will be deleted.
Make sure to save your changes before exiting the screen.